The L-743 is just one of those alignment tools that can do alignment checks that practically no other tool can do. It has gotten us thrown out of many a demo because we showed the customer something he did not want to see! You can lead a horse to water…..
However, having this awesome capability really does make aligning machines of all types SO much easier than before. So I thought I would illustrate the L-743’s unique ability with a recent job our master laser technician and trainer, Darel Ford, did at Machine Craft Co. in Concord, NH. The job was to align a newly purchased and quite large VTL made by Doosan of South Korea.
Everyone has to be different and Doosan is no exception, as this machine had separate bases for each of the 2 columns and the chuck of the machine. Normally they are all on one base. This meant that the alignment would be a bit more dicey than normal (trying to keep multiple machine base aligned is not easy) but that is not a problem for the L-743 and Darel!
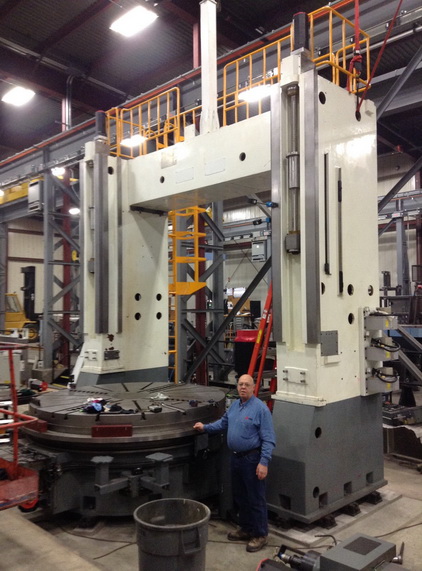
Here is the machine (and Darel):
The VTL has a 100” (2.5 m) chuck (table) and the columns were 12 feet (3.1 m) high and 12 feet apart.
First Task: Leveling the Table
The first part of the task was to level the chuck (round table). The only problem was it was crowned! Normal levels would not work. However, this was not a problem as Darel used our 3-point buck-in method to determine that the outside edge (kind of like a flange) of the table was flat (all in the same plane). This is important since it gave him a constant reference to work with, which is very important when you have 3 separate machine bases you have to deal with.
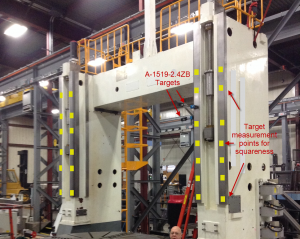
To level the table, Darel leveled the L-743’s split-prism level vials (1 arc second (.00006”/ft. or 0.005 mm/m accuracy). Then he put one of our A-1519-2.4ZB Wireless Targets on one point on the table and zeroed it out on our R-1355 PDA Wireless Readout. He then repeated this with 3 more targets, so all the targets were zeroed on the same point on the table. Using 4 targets on a large surface like this makes leveling extremely easy!
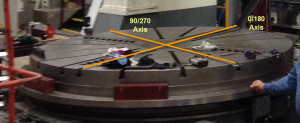
Next he moved the 4 targets directly along the 2 axes of the chuck (0/180 degree and 90/270) and measured the levelness. Of course, the points were not zero, so the riggers had to adjust it, which pretty easy. They just looked at the live display on the R-1355 and adjusting the table’s leveling mounts until all 4 targets displayed the same value, which means it is perfectly level. I think this took about 20-25 minutes.
This was important on this machine because of the multiple bases and the lack of a good reference surface. This gave Darel a good starting point to align the rest of the machine.
Columns Plumbed and Squared to Table
Now they had to align the squareness of columns to the table in 2 axes: Z to X (side to side) and Z to Y (front to back).
Since the L-743 was already level, this meant that the 2 vertical planes are plumb to earth. So Darel used this feature to plumb the front of the columns (Z to Y), and he also made sure the ways were not twisted (vertical twist), which believe it or not, is probably the most difficult thing to do in machine tool alignment. But when you use laser planes to do the measuring, then measurements like vertical twist are a simple thing to measure!
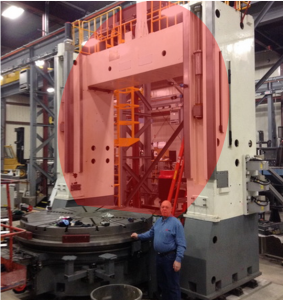
Here is a rough idea (not the real laser plane) of where the laser plane was placed to measure the front of the columns. As you can see, the laser plane scanned across the face of the 2 columns and since it is orthogonal (square) to the 3 reference points on the table, it can easily be used to square up (and plumb) the columns. To do this, Darel took a target and zeroed it at the bottom of the column. He then moved it up at regular intervals to check flatness and then at the top he looked at the measurement. If it’s square (and the ways are flat), then the reading should also be zero. It wasn’t, so Darel use the level bolts on the base of the column to make it zero.
Plumbing Up the Sides of the Columns
In addition to being plumb “front to back”, the columns needed to be plumbed in the Z to X or “left/right” direction (from the perspective of looking at the front of the machine). This took a couple of setups since the 2nd vertical laser plane is in an axis perpendicular to the laser plane sweeping across the front of the columns, so Darel had to start on the right side column, align it plumb and then move the laser to the left side, re-level it and then plumb up the left column.
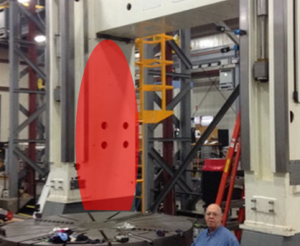
The laser plane looked something like this with the laser plane on the inside of the left column measuring squareness in the Z to X direction:
Column Squareness to Table
Now that the columns are plumb in 2 axes, Darel could then finalize the alignment. One great thing about using laser planes is you can easily switch from measuring level/flatness to checking parallelism. In this case, we use a process we call a 3-point Buck-In where we make the laser plane parallel to 3 reference points on a surface. In this case, we used 3 points on the flange of the table.
So to fine tune the squareness, Darel bucked-in to these 3 reference points and again measured the front of the columns for squareness to the “0/180” axis of the table. He then tweaked out the squareness of front of the columns and moved his target to the side of the right column and checked it for squareness in the 90/270 axis.
He then moved the laser to the left side of the machine and repeated this process for the left column.
The final task was to install spacer (cross beam) and install the gibbs, which sounds like it’s not much of a problem from an alignment perspective but if you think about adding all the at weight at the top of the machine, then you realize the columns most likely will move and go out of square. No problem, though, since Darel just setup targets on the columns and used the live data feature of the R-1355 to monitore the squareness while the spacer was installed and the gibbs adjusted.
The Final Results
Ok so how tight did Darel get this machine? He was able to make the table flange level to earth to .001” (0.025 mm) in 100” (2.5 m). In addition, the 2 columns were aligned in squareness to .001” but over a much longer distance: 12 feet (3.7 m). The 2 columns were also parallel to each other to the same .001”. Keep in mind that Darel was able to measure the entire length of the columns, not just the first 24” (610 mm) that a granite square can measure. Not only that but also trying to use traditional alignment methods, it would be have been all but impossible to measure the column travel for twist.
What did Machine Craft tell us?
- Had they used their current methods (levels, squares, straight edges, ect.) there is no way they could have gotten the alignment accuracy we were able to achieve with the L-743.
- It would have taken them an extra week, at least, to align the machine without the L-743. We did it in 3 days, which, if compared to 8 days with traditional methods, means a 2.3 times faster alignment!
- They would not have been able to check the parallelism of the two columns and they would not have been able to tell if the columns moved when they installed the gibbs on the top spacer that mounted to the two columns.
- They realized that the table was not flat, so it would have been impossible to level the table and use it as a reference. Without the knowing that the table was out of flat, they could not really set the machine up properly. To use a granite square to measure squareness, the table has to be flat or there will be errors in the measurements. In this case, it would have been a big problem.
Needless to say, they are very happy with the awesome measuring capabilities of the L-743! And, as usual, they took a liking to Darel! He does that to you!
Great job, Darel!

HOW ABOUT
CENTERING ON TABEL BIG PARTS ACCORDING TO BIG HOLES AROUND 300MM ON HORIZONTAL TURNING TABLE?
So what’s the story on the crowned chuck? I would be calling Doosan and having that fixed before leveling the machine, I guess for big castings it’s not a huge deal since everything is propped up on jacks. Is the crowning a design feature or flaw?